Note
You can use the “Events” page to schedule events for all neighborhood residents. If your event is not open to all neighborhood residents, do not add it to the “Events” page. To schedule an event that is open to only some neighborhood residents, you can use private messages or a private group. (For help with private messages, see Chapter 8, How to Read and Send Messages, Section 8.3, “Private Messages”. For help with private groups, see Chapter 9, Groups.)
To add a new event:
Click the green button near the top right corner of the “Events” page. A “Create an event” form will come into view:
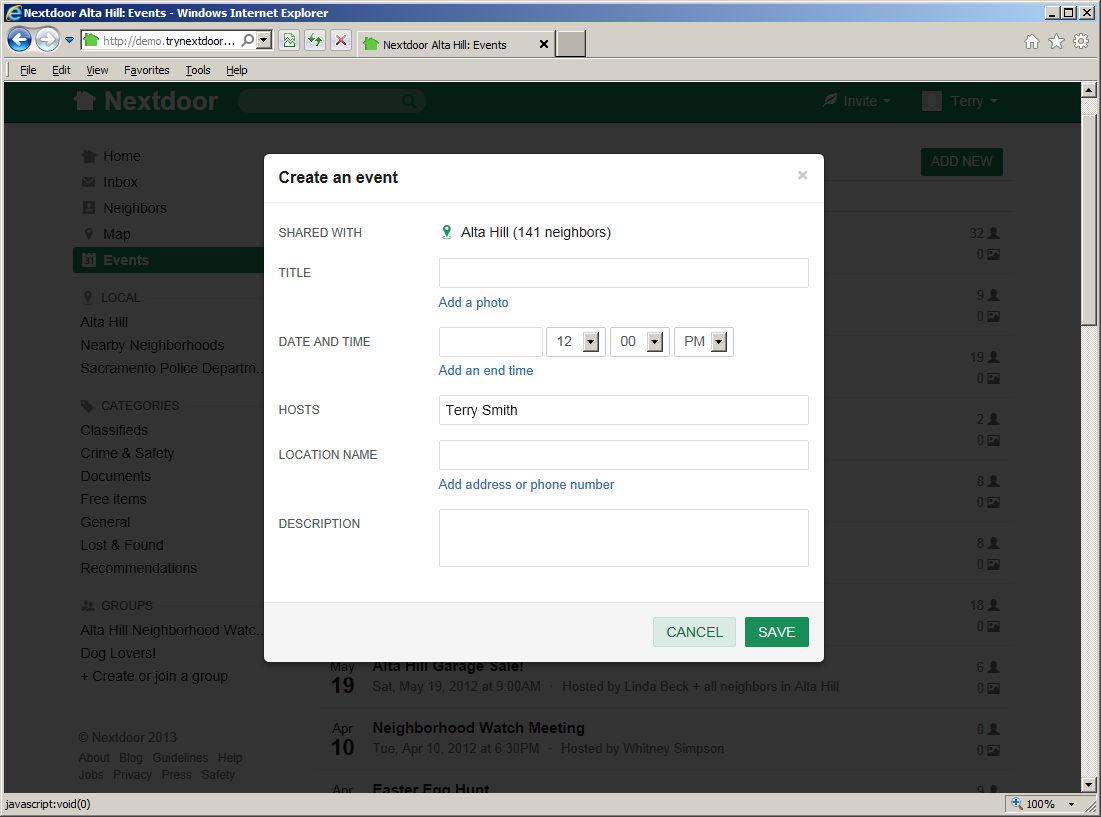
Complete the “Create an event” form:
Click in the TITLE box. Type a short description for the event, such as
Backyard BBQ.If you want to add a photo to the event, click the Add a photo link.
Click the gray button. A dialog box from your computer will come into view.
Use the dialog box to find the directory or folder on your computer that contains the photo file.
When you find the file, select it.
Click in the DATE AND TIME box. A calendar will come into view. The calendar shows today's date. To move to a different month and/or year, click the right-arrow symbol to the right of the month and year. When the calendar shows the correct month and year, click the number for the day of the event. You will see the date you chose in the DATE AND TIME box.
If the event does not start at noon, set the event start time with the three boxes to the right of the date box:
Click the down-arrow symbol to the right of the 12. A list of hours (1 thru 12) will drop down. Click the hour that the event starts.
If the event starts at 5 minutes or more after the hour, click the down-arrow symbol to the right of the 00. A list of minutes (05 thru 55) will drop down. Click the minute that the event starts.
If the event starts before noon, click the down-arrow symbol to the right of PM. A list that includes AM and PM will drop down. Click AM.
If you want to add an end time, click the Add an end time link. An END TIME line will come into view. Do the step above again to set the end time.
The HOSTS line shows your name. If you are not the host of the event, click in the HOSTS box, then use the <Delete> and/or <Backspace> keys to delete your name. Type the name of the person or organization that will host the event.
Click in the LOCATION NAME box. Type a description for the location of the event, such as
My back yard.If you want, you can add an address to the event.
Note
If you add an address, Nextdoor can display a map of the address when neighbors click the event.
To add an address and/or phone number to the location, click the Add address or phone number link. ADDRESS, CITY, and PHONE lines will come into view. Click in the ADDRESS, CITY, and/or PHONE box, then type the information.
Click in the DESCRIPTION box. Type a longer description for the event, such as
We'll provide meat, bread, and BBQ sauce. You bring chips, dessert, beverages, and your appetites!If you want neighbors to let you know if they will be at the event, click the Allow RSVPs for this event box.
To schedule the event, click the green button.
Note
To not schedule the event, click the pale green button.
A page with full information about the event will come into view.
After you schedule an event, you can make changes to the event and see more information about the event.
Use the buttons below the event description to make flyers or change information about the event:
: If you want, Nextdoor can help you make flyers for your event. Nextdoor will make a PDF (Portable Document Format) file which contains information about your event. You can open and print the file with PDF software such as Adobe Reader.
Note
To download Adobe Reader, go to http://get.adobe.com/reader/.
To make flyers:
Click the green button. A “Print event flyers” page will come into view.
Click the green button. A “Your printable invitation is ready!” page will come into view.
Click the green button. If your web browser asks if you want to “open or save” (or “download”) the file, click the “save” or “download” selection.
Possibly a dialog box from your computer will come into view. Use the dialog box to find the directory or folder on your computer where you want to save the file.
Use software such as Adobe Reader to open and print the file.
Note
The flyers contain a website address that neighbors can use to RSVP for the event. Neighbors who are not Nextdoor members can use the website address to join Nextdoor.
: If you want to delete your event, click the green button. A “Delete this event?” form will come into view. To delete the event, click the green button. To not delete the event, click the pale green button.
: To make changes to your event, click the button. The “Create an event” form will come into view. Make the necessary changes to the event information, then click the green button. (To discard your changes, click the pale green button.)